
FrigateとCoral USB Acceleratorのセットアップメモ。
ハードウェア
TPU
Coral USB AcceleratorはIoT本舗から購入予定。はじめてPayPay決済を利用した。
2023/6/3(土) Coral USB Accelerator(送料込で10,980円)注文、メール便で土日の配達なし
2023/6/6(火) Coral USB Accelerator到着、まだ何の準備もととのっていない。
PC
Frigateはdockerで動作させるのが推奨のようだ。Proxmoxのような仮想環境で動作させる事例を探したのだが、ProxmoxではUSBデバイスをパススルーするのが難しいみたいなので専用PCを用意して推奨パターンで動かすことにする。
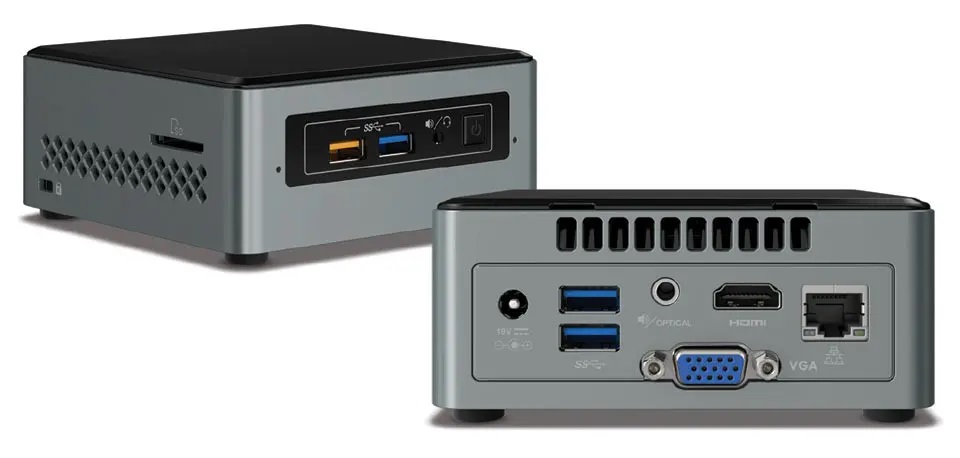
2023/6/9(金) NUC6i5SYH(送料、pay-easy手数料込で15,300円、じゃんぱら)を購入、メモリ(16GB×2)、SSD(500GB)は手持ちのものを流用。本題とは関係ないが肥後銀行ではpay-easyでじゃんぱらの取り扱いがなかった(じゃんぱらの収納機関番号をいれたところでエラーとなる)。別の金融機関はOKだったのでしかたなくそちらで決裁した。
PCその2
NUC6i5SYHが不安定だったので、Asrock DeskMini X300 + 64GBメモリ + Ryzen 5 5600G + CPUクーラーを購入(メモリは別サーバの32GBと交換)。7/4に組み立て完了。
PCその3
X300+5600Gだとオーバースペックと思われるので、サーバとして運用しているDeskMini 110(4560G)と交換。その後、CPUをCore i5 6500Tに交換。さらにCore i5 7500に変更。7500でロードアベレージの最高値が2くらいに収まる。6500Tと7500の性能差は意外と大きいような気がする。
OS
ubuntu server LTS 22.04.2
isoイメージをダウンロードし、ブータブルUSBを作成しておく。rufus利用。
インストール
PCの準備
6/11 NUC到着。OSのインストール前に以下の準備を行っておく。
- VT-xを有効にしておくこと
- BIOSを0065から0073へアップデート
DeskMiniで行った設定
- BIOSのアップデート
- VT-xの有効化
- 35W制限
ubuntuのインストール
OSのインストール後、一般ユーザの環境設定やらautofsの設定を行っておく。
dockerのインストール
以下のスクリプトを実行してdockerをインストール
#!/bin/sh

# update existing list of packages
sudo apt update
# install a few prerequisite packages which let apt use packages over HTTP
sudo apt install apt-transport-https ca-certificates curl software-properties-common
# add the GPG key for the official Docker repository to your system
curl -fsSL https://download.docker.com/linux/ubuntu/gpg | sudo gpg --dearmor -o /usr/share/keyrings/docker-archive-keyring.gpg
# add the Docker repository to APT sources
echo "deb [arch=$(dpkg --print-architecture) signed-by=/usr/share/keyrings/docker-archive-keyring.gpg] https://download.docker.com/linux/ubuntu $(lsb_release -cs) stable" | sudo tee /etc/apt/sources.list.d/docker.list > /dev/null
# update your existing list of packages again for the addition to be recognized
sudo apt update
# make sure you are about to install from the Docker repo instead of the default Ubuntu repo
apt-cache policy docker-ce
# install Docker
sudo apt install docker-ce

#
sudo systemctl status docker
特定の一般ユーザでdockerコマンドを実行できるようにする
以下のコマンドをdockerコマンドを利用するユーザで実行する。
#!/bin/sh

# add your username to the docker group
sudo usermod -aG docker ${USER}
# apply the new group membership
su - ${USER}
# confirm that your user is added to the docker group
groups
docker-composeのインストールバージョン確認
以下のスクリプトを実行してdocker-composeをインストールする
以下のコマンドを実行する。
#!/bin/sh

# download Docker Compose
sudo curl -L https://github.com/docker/compose/releases/download/2.18.1/docker-compose-`uname -s`-`uname -m` -o /usr/local/bin/docker-compose
# make it executable
chmod +x ~/.docker/cli-plugins/docker-compose
# check it was successful
docker compose version
アプリプロジェクトのルート
/home/docker とする。この下にdocker-compose.yamlを配置する。
homeassistantのインストール
docker-composeを利用してインストールする。まず、プロジェクトのルートに移動する。
# cd /home/docker以下の内容のdocker-compose.100ファイルを作成する。
version: '3'
services:
  homeassistant:
    container_name: homeassistant
    image: "ghcr.io/home-assistant/home-assistant:stable"
    volumes:
      - ./home-assistant/config:/config
      - /etc/localtime:/etc/localtime:ro
    restart: unless-stopped
    privileged: true
    network_mode: host
上記ファイル中の「./home-assistant」は「/home/docker/home-assistant」のこと。
つづいて以下のコマンドを実行する。
# cp docker-compose.100 docker-compose.yaml
# docker compose up -d
しばらく(数分)でインストールが完了し、HAがコンテナで動作する。docker psコマンドなどで確認。
ブラウザでこのホストのアドレス:8123に接続しHAの設定(アカウントの作成、位置の登録など)を済ましておく。
MQTTブローカーのインストール(apt install編)
参考にしているサイトでは、MQTTブローカーもdockerでインストールするようになっているが、どうしてもうまく動かなかったので、ホストOS(ubuntu)にインストールする。→うまく動作したので次の節で説明する。この方法(docker)が推奨されている方法である。
# apt install mosquitto以下の内容で定義ファイル/etc/mosquitto/conf.d/mosquitto.confを作成する
listener 1883 0.0.0.0
allow_anonymous false
password_file /etc/mosquitto/password
ここまで書いてて、dockerで動作しなかった原因がわかったような気が…。でもこのまますすむ。dockerでの動作は余裕があったら行う。→次節で説明している。
つづいてパスワードファイルを作成する。
# cd /etc/mosquitto
# vi password
ファイル(ファイル名はpassword)の内容は
user1:1234567890abcdefのように記述する。ユーザは複数でも可。
つづいて以下のコマンドを実行する。
# mosquitto_passwd -U passwordすると、ファイルの中が次のように変換される。
user1:$7$101$UCkktAUTrhnRBMUY$8WMLSbQdyLh3uyoPLx+MT5CObV1cez8TeW8LB+UItL+ICqayh/vHuEXW+taEdCrZ9M7kRGY0kd9MoUhChJhP+Q==再起動。
# systemctl restart mosquittoテスト。
認証なしだとローカルのサブスクも拒否られる。
% mosquitto_sub -h localhost -t /this/is/a/topic
Connection error: Connection Refused: not authorised.
サーバ側で以下のコマンドを実行。
% mosquitto_sub -t t-test -u user1 -P password --topic test/test_1mosquitto-clientをインストールした他のLinuxマシンから以下のコマンドを実行する。
% mosquitto_pub -t test -u user2 -P password2 --topic test/test_1 -m "test! test!" -h 10.10.10.1-t オプションは一致しなくてもメッセージはサブスク側に表示されるようだ。
MQTTブローカーのインストール(docker編)
インストール
以下の内容のファイルdocker-compose.200ファイルを作成する。(先頭の空行も含めて)
  mosquitto:
    container_name: mosquitto
    image: eclipse-mosquitto
    volumes:
      - ./mosquitto/config:/mosquitto/config
      - ./mosquitto/data:/mosquitto/data
      - ./mosquitto/log:/mosquitto/log
    restart: unless-stopped
    environment:
      - PUID=1000
        PGID=1000
    ports:
      - 1883:1883
      - 9001:9001
以下の内容のファイルを作成し、/home/docker/mosquitto/config/mosquitto.confに格納する。
# Place your local configuration in /etc/mosquitto/conf.d/
#
# A full description of the configuration file is at
# /usr/share/doc/mosquitto/examples/mosquitto.conf.example


listener 1883 0.0.0.0
persistence true
persistence_location /mosquitto/data/
log_dest file /mosquitto/log/mosquitto.log

allow_anonymous false
password_file /mosquitto/config/password
つづいてデフォルトのユーザ(admin)・パスワード(password)を設定する。以下の内容を/home/docker/mosquitto/config/passwordに格納する。
admin:$7$101$cnSh5Ey47Rm/kO2o$deMGXkDTwIXDn0v8aSVyj8Dwel13Ob1If8dHaq8Nj+LMfsPl1sM9x4RdJBc8421Q72+qJBPFy50d5NMkUPzr1A==以下のコマンドを実行してmosquittoをインストールする。
# rm docker-compose.yaml
# cat docker-compose.[12]00 > docker-compose.yaml
# docker compose up -d
パスワード変更
つづいてユーザadminのパスワードを以下のコマンドで変更する。
# docker compose exec mosquitto mosquitto_passwd -c /mosquitto/config/password adminテスト
省略した。
ホームアシスタント統合のセットアップ
Home Assistantに接続して以下の操作を行う。
設定→デバイスとサービス→統合を追加→MQTTで検索→MQTT選択→IPアドレス・ユーザ名・パスワード入力→送信
完了のメッセージが表示されたらOK
frigateのインストール
以下の内容のファイルdocker-compose.300ファイルを作成する。(先頭の空行も含めて)
  frigate:
    container_name: frigate
    privileged: true
    restart: unless-stopped
    image: "ghcr.io/blakeblackshear/frigate:stable"
    shm_size: "1024mb"
    devices:
      - /dev/bus/usb:/dev/bus/usb # passes the USB Coral, needs to be modified for other versions
#     - /dev/apex_0:/dev/apex_0 # passes a PCIe Coral, follow driver instructions here https://coral.ai/docs/m2/get-started/#2a-on-linux
#      - /dev/dri/renderD128 # for intel hwaccel, needs to be updated for your hardware
    volumes:
      - /etc/localtime:/etc/localtime:ro
      - ./frigate/config:/config:ro
      - ./frigate/media:/media/frigate
      - type: tmpfs # Optional: 1GB of memory, reduces SSD/SD Card wear
        target: /tmp/cache
        tmpfs:
          size: 1000000000
    ports:
      - "5000:5000"
      - "8554:8554" # RTSP feeds
      - "8555:8555/tcp" # WebRTC over tcp
      - "8555:8555/udp" # WebRTC over udp
    environment:
      LIBVA_DRIVER_NAME: radeonsi
      FRIGATE_RTSP_PASSWORD: "7XXXXXXX"
以下のコマンドを実行し、frigateをインストールする。
# rm docker-compose.yaml
# cat docker-compose.[123]00 > docker-compose.yaml
# docker compose up -d
いったんfrigateを止めて、/home/docker/frigate/config/config.ymlを以下の内容で作成する。
mqtt:
  host: 192.0.2.235
  user: frigate
  password: password

detectors:
  coral:
    type: edgetpu
    device: usb

logger:
  default: info

rtmp:
  enabled: false

live:
  height: 720
  quality: 1

birdseye:
  enabled: True
  restream: false
  width: 640
  height: 360
  quality: 1
  mode: continuous

ffmpeg:
  hwaccel_args: -hwaccel vaapi
  #hwaccel_args: -hwaccel h264_amf
  #  hwaccel_args: -hwaccel h264_amf
  # TODO - This is the Hardware Acceleration for Intel-based CPUs (<10th Generation) via Quicksync
  # check that this fits your use case - https://docs.frigate.video/configuration/hardware_acceleration
  #hwaccel_args: -hwaccel vaapi -hwaccel_device /dev/dri/renderD128 -hwaccel_output_format yuv420p
  #hwaccel_args: -hwaccel vaapi
  #hwaccel_args: -hwaccel qsv

cameras:
  sv3c_sv_b01w_1080p_hx:
    ffmpeg:
      inputs:
        - path: rtsp://user:pass@192.0.2.181:554/11
          roles:
            - record
        - path: rtsp://user:pass@192.0.2.181:554/12
          roles:
            - detect
    objects:
      track:
        - person
      filters:
        person:
          min_score: 0.4
          threshold: 0.7
    detect:
      width: 640
      height: 360
      fps: 5
    snapshots:
      enabled: True
    record:
      enabled: True
      retain:
        days: 2
      events:
        retain:
          default: 10
  tp_link_tapo_c210_1:
    ffmpeg:
      inputs:
        - path: rtsp://user:pass@192.0.2.182:554/stream1
          roles:
            - record
        - path: rtsp://user:pass@192.0.2.182:554/stream2
          roles:
            - detect
    objects:
      track:
        - person
      filters:
        person:
          min_score: 0.4
          threshold: 0.7
    detect:
      width: 640
      height: 360
      fps: 5
    snapshots:
      enabled: True
    record:
      enabled: True
      retain:
        days: 2
      events:
        retain:
          default: 10
  tp_link_tapo_c210_2:
    ffmpeg:
      inputs:
        - path: rtsp://user:pass@192.0.2.183:554/stream1
          roles:
            - record
        - path: rtsp://user:pass@192.0.2.183:554/stream2
          roles:
            - detect
    objects:
      track:
        - person
      filters:
        person:
          min_score: 0.4
          threshold: 0.7
    detect:
      width: 640
      height: 360
      fps: 5
    snapshots:
      enabled: True
    record:
      enabled: True
      retain:
        days: 2
      events:
        retain:
          default: 10
つづいて、docker start frigateを実行する。
HomeAssistantへHACSのインストール
# cd /home/docker/home-assistant/config
# wget -O - https://get.hacs.xyz/install | bash -
これで、このディレクトリの下にcustom_components/hacs/*が作成される。
unzipがない場合は、apt install unzipでインストールする。
念のため、コンテナの再起動を行っておく。
HACSの統合
この操作にはgithubアカウントが必要である。あらかじめ作成しておく。
HAにログインし、以下の操作を行う。
設定→デバイスとサービス→統合を追加→検索フィールドに「HACS」を入力して検索→下にHACSが表示されるのでクリック→四つのボックスにチェック→送信クリック→URLと8桁のキーが表示される→URLをクリックする(githubにログインしていない場合ログインする)→8桁のキーを入力する→Authorize hacs→成功の画面が表示されたら右下の完了をクリックする
これで、ホームアシスタント画面左にHACSが追加される。
frigateの統合その1
画面左のHACSをクリック→Integrations→EXPLORE & DOWNLOAD REPOSITORIES→Add repository画面の検索ボックスに「frigate」→画面下の「frigate」をクリック→画面右下のDOWNLOADをクリック→frigateのリポジトリのバージョン選択画面が表示される(v4.0.0v5.7.0を選択)→右下のDOWNLOADクリック→システム再起動
frigateの統合その2
設定→デバイスとサービス→統合を追加→frigateで検索→frigate選択→URLをIPアドレスで入力→送信
これで、オーバービューにカメラの画面が追加される。
ffmpeg+Ryzen 5 5600G
docker内のfrigateで利用するffmpegのハードウェアアクセラレーションのオプション指定。Ryzen 5 5600Gでの設定。docker-compose.yamlファイルのenvironment: に「LIBVA_DRIVER_NAME: radeonsi」を追加する。
  frigate:
(途中略)
    environment:
      LIBVA_DRIVER_NAME: radeonsi
つづいて、frigateのconfig.ymlに以下の定義を追加する。
ffmpeg:
  hwaccel_args: -hwaccel vaapi
これで、frigate→systemの画面のGPUにamd-vaapiが表示される。

コメント